This post is for software developers who are new to process of creating Salesforce managed packages. It provides a simple step-by-step guide to creating your first managed 2GP.
Here is the companion video.
Why 2GP?
The most important reason we think you should use second-generation managed packaging (managed 2GP) is that it provides a source-driven model for development. The source-code in your version control system becomes the source of truth, rather than a Salesforce org. This is a pre-condition for using continuous integration and continuous deployment (CI/CD) – a cornerstone of modern software development. For other benefits, see the 2GP guide.
Beyond this, 2GP is the future of package development. Salesforce is encouraging developers to move to 2GP and has released Package Migrations to automate the conversion of 1GP packages to 2GP.
Set up your development environment
Enable Dev Hub in your Partner Business Org (PBO). Navigate to Setup > Development > Dev Hub. Note that once enabled, you cannot disable this setting. This will be called your Dev Hub org.
Create a Developer Edition Org to register a namespace for your 2GP managed package. In your Developer Edition Org (not your PBO / Dev Hub), navigate to Setup > Apps > Packaging > Package Manager. Edit the Namespace Settings section to create the namespace. This will be called your Namespace org.
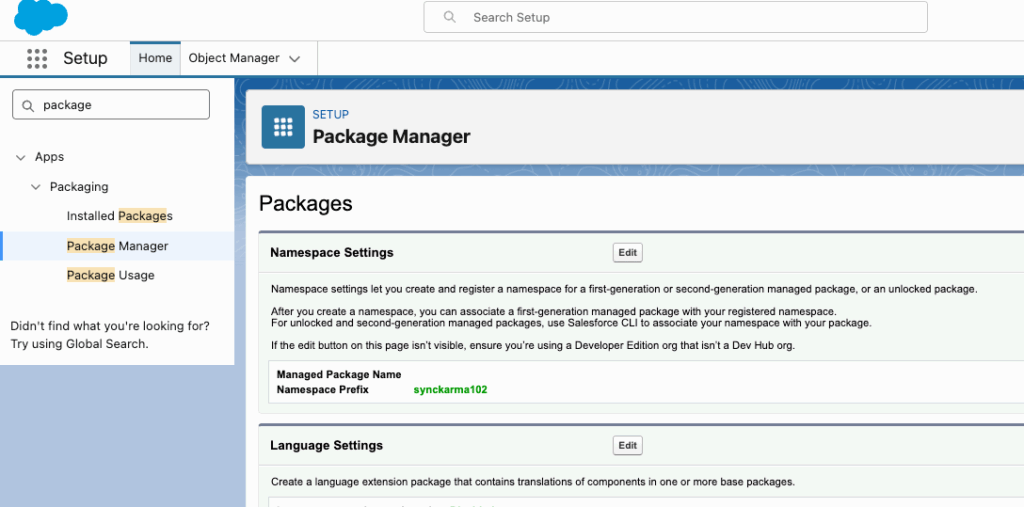
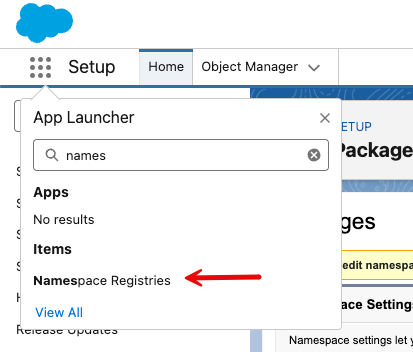
Link the namespace to your Dev Hub org. Open the Namespace Registry from the App Launcher.
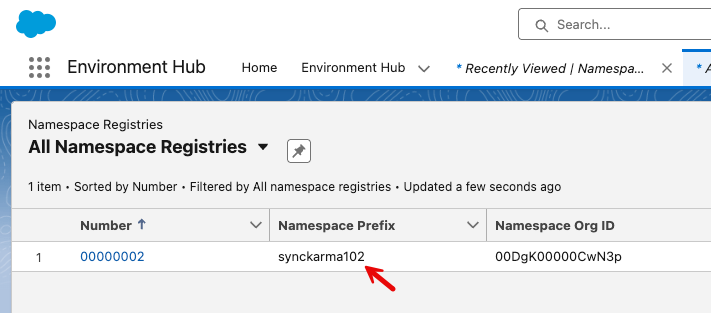
Click Link Namespace, log into your Namespace org and authorize your Dev Hub to link the namespace. You should now see a registered namespace in your Dev Hub.
Next, create a Salesforce DX project in Visual Studio Code. In the process of doing that, you will install the Salesforce CLI. You should then use the CLI to authorize you Dev Hub org, set it as the default Dev Hub, and give it the alias devhub, like this:
sf org login web –set-default-dev-hub –alias devhub
You can also use the VS Code command – SFDX: Authorize an Org – to authorize your Dev Hub.
In creating the SFDX project, an sfdx-project.json file was generated. This is the blueprint for the package – defining structure, namespace, package directories, etc. Another definition file was created as well – config/project-scratch-def.json. This one provides the blueprint for scratch orgs that you create to build and test your managed 2GP package.
Develop and create the package
We are going to use a scratch org to illustrate how to pull metadata components into a project. To get started, create a scratch org using this CLI command or the VS Code command SFDX: Create a Default Scratch Org ...
sf org create scratch –definition-file config/project-scratch-def.json –alias scratch01 –set-default
Once the scratch org has been created, and set as the default in your project, you can open it in your browser using this CLI command or the VS Code command SFDX: Open Default Org.
sf org open –target-org scratch01
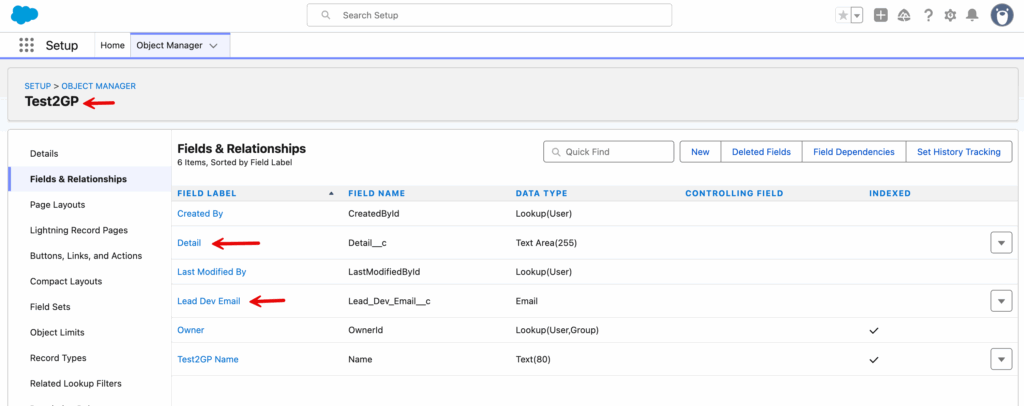
Once the scratch org is open, we will use the UI to create a very simple package with one custom object named Test2GP that has a couple of custom fields: Detail and Lead Dev Email. We are going to pull this metadata for this custom object down to the SFDX project and bundle it in our 2GP. Here’s what the custom object looks like in the Object Manager.
To pull the metadata for our changes to the scratch org, we use this CLI command (or the VS Code command SFDX: Pull Source from Default Org):
sf project retrieve start
After running the command, you will see the metadata in your project. For example, the custom object and custom fields can be found under force-app/main/default/objects/Test2GP__c.

You will also notice that metadata has been pulled for the Layout that was generated for the Test2GP and the Profile Admin which was granted access to Test2GP.
To create the package from this project we edit the sfdx-project.json file to add our namespace: synckarma102.
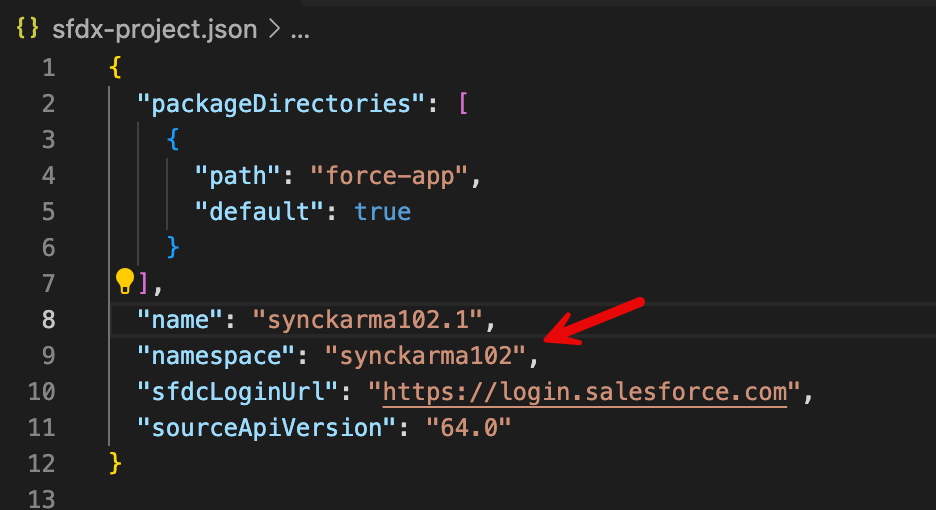
To create the package, we use the following CLI command where name is the name you want to give the package.
sf package create –name synckarma102.1 –path force-app –package-type Managed –target-dev-hub devhub
When creation has finished, a Package Id is returned. If you look at sfdx-project.json now, you will notice that this Id has been added. You will also notice that a versionNumber has been added with the suffix NEXT. This will be automatically replaced with the next number in the MAJOR.MINOR.PATCH sequence. We feed that Id into the CLI command that creates the version for the package. The package version is a snapshot of the current state of the project. As your project progresses, you will generate new versions each time you want to install and test the package.
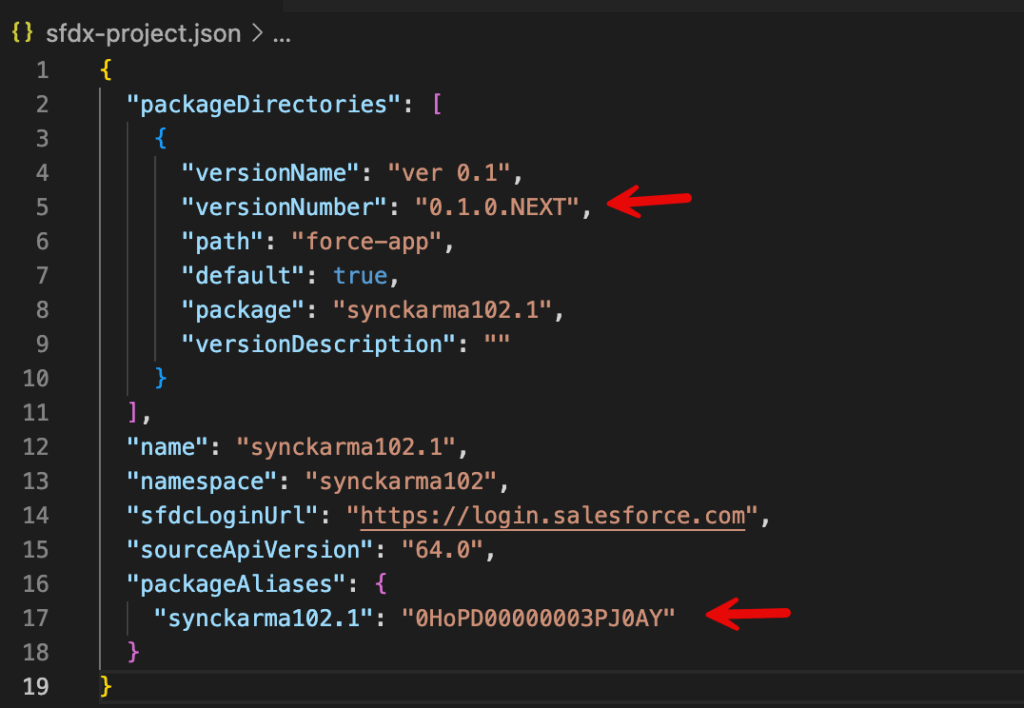
We feed that Package Id into the following command, that creates the version for the package. The --installation-key flag is used to provide a password that must be used to install the package in an org.
sf package version create –package 0HoPD00000003PJ0AY –installation-key password123 -v devhub
The package version creation process runs in the background. The output of running the above command includes the following instruction to check on the progress of the package version creation. Note that 08cPD0000000bQzYAI is the Id of the version creation job that is used to check the status.
sf package version create report -i 08cPD0000000bQzYAI
While the package version is completing, create another scratch org that we will use to test package installation.
sf org create scratch –definition-file config/project-scratch-def.json –alias scratch02
Install and test the package
When version creation is completed, the report will provide a Subscriber Package Version Id that is used to install this version of the package in an org. There is also an Installation URL that you can use for installation via a browser. This can be shared with other developers of testers who are working on the package.

The following CLI command can be used for package version installation, and is preferred over the Installation URL for automated installation as part of CI/CD pipelines. Note that we are installing in our newly created scratch02 org.
sf package install –package 04tPD00000142sHYAQ -k password123 –target-org scratch02
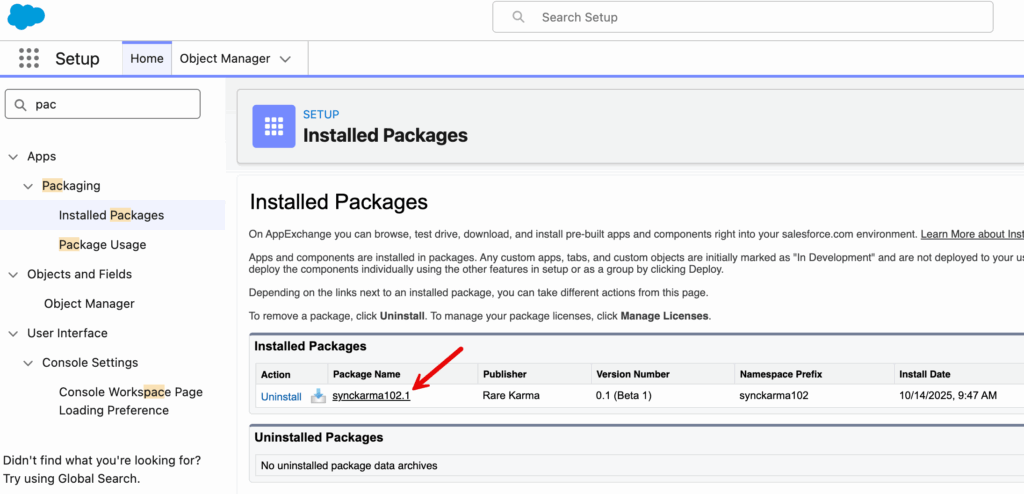
When the package install completes, open the scratch02 org (sf org open --target-org scratch02). You will see that the Test2GP custom object has been created – demonstrating that the package installation succeeded! You can also look in Setup > Apps > Packaging > Installed Packages to see that the package has been installed.
Also, feel free to checkout the YouTube video.